Showing posts with label Decorated Cakes. Show all posts

Friday, January 28, 2011

Star Wars Cake, Cupcakes & Cookies

These are what i have been so busy with. My friend Angela (Sweet-Tooth-Fairy) asked me to take on her client in her absence and she "pushed" me to accept it...knowing that i need to stop watching too much TV and get some work done. LOL!   

R2-D2 CAKE

Front View of R2D2 Cake

Side View of R2D2 Cake


R2-D2 & R2-M5 CUPCAKES

mini R2-D2 & R2-M5

mini R2-D2 & R2-M5
These are my diy cupcake wrappers in case you all are wondering..:) 
I downloaded a file on papercraft from a Japanese website and edited them in photoshop and adjusted to the size that i wanted for my cupcakes.  


STAR WARS  CHARACTER COOKIES

Star Wars character cookies. 
These cookies are harder to ice than i thought! I had a hard time trying to ice them esp. Boba Fett..took me a really long time that i almost tear my hair out..lol!

Many thanks to Angie (another friend name Angela..lol!) who carried the cutters all the way back from US. 

Misc Star Wars logo cookies
Just playing around with some designs with my extra cookie dough
These are totally inspired by Angela of Sweet Tooth Fairy and Callye of Sweet Sugar Belle. 

Cookies packed.  I did the labels on my own. :D 


Now i'm taking a break from baking...and a break from Star Wars...

Even though i didn't join HCB this week for the Genoise Tres Cafe, i did bake part of the cake and cupcakes from HCB recipes.  For cupcakes, i had to experiment & weigh the batter to the exact grams a bit to get a dome..and realised that flour (cake or all purpose) makes a difference to the texture and the density of the cake and the shape as well!

The only thing that didn't work from Rose's recipe was the pastillage taken from Cake Bible.   Not sure why but i made it twice and it was too wet, and i add lots of icing sugar before it even become a dough and it became crumbly later so i had to discard. 


Monday, December 27, 2010

Banana Pajamas Cake

My son's birthday is on boxing day and we usually celebrate his birthday on Christmas Eve with logcake as his birthday cake.  But this year, I decided to bake a special cake for him.  Initially I thought of just baking a normal quick and easy chocolate cake (like last  year) or go down to the bakery to buy him a cake...but guilt got the better of me.  Even though I am not certain if he knows what or when his birthday is (and he is still rather confused as to how old he actually is), I should still make him feel special by baking one of his favorite character cakes.   I figured Banana Pajamas is probably quite appropriate because whenever you ask him to sing a Birthday Song, he would sing it as "...Happy Birthday B1 & B2.." and not his name or any other person's name...because he is replaying this episode of Banana Pajamas in his mind - of them celebrating their birthday with Morgan, Lulu & Amy with a cake, munchy honey cakes and yellow jelly.. 

This design is taken from Debbie Brown's book. Of course her Banana Pajamas character cake is way way way better than this.  That's because i didn't follow her instructions and I used my own cake base and thus resulted in a not-so-great Banana Pajamas. But inspiration and design is from Debbie Brown.  


Again, i couldn't decide which photo i like better, thus posted up both of them.   Since this cake wasn't exactly planned for and last minute i rushed through, i felt that i didn't really do a very good job in carving or fondant work..but at least they still look like Banana Pajamas since my son is able to identify them..and he seems pretty happy when i completed it.  We have yet to cut the cake, so not sure if he will be upset if we cut it tonight though..

Happy 18th Birthday to my son Joel! Yes, he is 18 already and i can't believe it....i  keep forgetting at times and still sees him as my little boy..  

Updates: [He didn't want to cut the cake at all...probably he doesn't sees it as a cake and doesn't want to destroy it........hmm..maybe i should just bake him a plain cake next time so at least he knows a cake is a cake..hahaha]. 


Friday, October 29, 2010

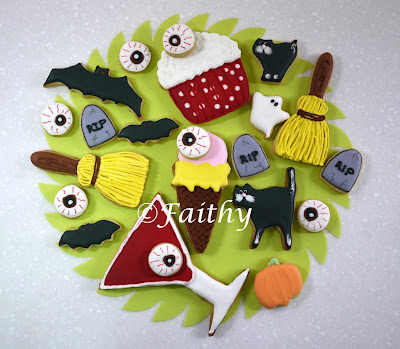
Halloween: Cookies & Marzipan Finger Cupcakes (guest-post @ PinkLittleCakes)

Thank you Kathia for inviting me to guest post! :D

Hi! I'm Faithy! I have no idea what Halloween is since we don't really celebrate here in Singapore.  So when Kathia of Pink Little Cakes asked me if i would like to guest post in her Halloween series, i figured it would be fun and agreed.  How difficult would it be since I've seen gift shops selling halloween related stuff etc...?

I thought for a really really long time (almost a month since i opted to be the last in line ...) and couldn't come up with any ideas at all! Everyday I would read all these wonderful creations that other awesome guest-bloggers were creating. And as the date for my posting came nearer, i panicked!  So on Sat evening....so i rushed out to the shop and bought some halloween cutters and made these cookies....


However, because of my bad time management and no planning, I rushed through to ice these cookies on Sunday. My husband was nagging at me all the time to finish up quickly cos it was past midnight and I needed to get up early for work the next day.  Hence, I felt I didn't do a good job with these cookies.  

The next day, I thought about it again and decided that maybe i should make cupcakes! With the halloween theme, I'll make marizpan finger toppers for the cupcakes!  These, i thought to myself, would be soo cool!!   So, right after I came home from work, i sat down to mould these finger toppers with marzipan..   But while making these fingers from mazipan, i was quite disturbed and frightened..cos they began to look more and more realistic to me.  I wasn't sure at this point if i wanted to use them as cupcake toppers so i just took some photos of them as 'lollipops'.  


My husband came home, saw these and said i should cut off the stem to make them look more realistic - and he added that if i wanted to do something like that, i should make them look as realistic as possible. With his advice, I cut off the stem and they ended up looking even more frightening and morbid..!?!  I took these photos really quickly....as I was felt rather gross out...lol! 


Creepy isn't it?  Well, as i was saying, i was pretty disturbed, so i packed these fingers into a box and brought it with me to work the next day. I showed everyone who came to my office to see what they had to say about the fingers. Most took it as a matter of fact and didn't seem very disgusted or shocked.  Some even encouraged me to use it as toppers for my cupcakes..saying they don't mind eating the cupcakes even with these fingers on it. They thought it would be fun and in line with the halloween theme.  I was encouraged....but wasn't totally convinced.  Took me 2 days to think about it and the fingers sat in my office for 2 days before i had the courage to bring them back home again..hahaha...

Finally I made chocolate cupcakes with frosting and placed the marizpan fingers on each cupcake. So I ended up with these....


If you want the "shock" factor for your halloween party, i think these marzipan fingers are the way to go... definitely be the talk of the party!   :S

Finally, i'm sharing with you the recipe to chocolate cupcake (as seen in the photos above). It's very light, soft and moist just like what the book said it would be.  However, I didn't find it as chocolatey as i would like though..

Chocolate Sour Cream Cupcake 
adapted from the book Cupcakes! by Elinor Klivans


Ingredients:-
3 ounces unsweetened chocolate, chopped
1 cup unbleached all purpose flour
1/2 tsp baking powder
1/2 tsp baking soda
1/4 tsp salt
1/2 cup unsalted butter
1-1/4 cups sugar
2 large eggs
1 tsp vanilla extract
1/2 cup sour cream
1/2 cup milk


1. Preheat oven to 180c.
2. Melt the chocolate in microwave.
3. Sift flour, baking powder, baking soda and salt in a medium bowl and set aside
4. Beat the butter and sugar until fluffy about 2 mins using electric mixer
5. On low speed, mix in the melted chocolate. Scrape side of the bowl.
6. On medium speed, add eggs one at a time until each is blended into batter
7. Add vanilla and beat until mixture looks creamy, about 1 min
8. Mix in sour cream until no white streaks
9. On low speed, add half flour mixture, mixing to incorporate it. Mix in water, then mix in the remaining flour mixture until it is incorporated and the batter looks smooth.  
10. Spoon the mixture into cupcake cups and bake for 15-20mins (depending on size of the cup).


Thursday, October 14, 2010

Flora Painted Cake


This is just a practice (to-paint) cake and for nobody in mind...as i'm typing this, this cake is still in the fridge untouched..lol!   I had major fondant issues with this cake and the fondant kept tearing...bugs me to see tears/crack lines on the fondant. Strange.. i could only blame it on the weather and for me not turning on the air conditioning.   

I painted this free-hand and it's my first time painting directly on the fondant cake.  It feels different and not like the usual painting on paper..:S.  Definitely more room (lots in fact!) for improvement for sure! I need to find the right consistency for the paint - food colors i meant.  **The flower pattern that i've painted is made with reference to Donna Dewberry's paint work in her book.** 

I've been slacking in commenting on my blogger friends' blog posts (you all know who you are..:D..but i do try to catch up whenever i can..)..because i have been busy with translating Pierre Hermé's Macaron book to English with the help of google translate..lol! Yup..here it is...


Don't ask me why I bought this since it is in French and I don't read or write or speak French. I suppose this is THE Pierre Hermé Macaron book and it was sitting on the bookshelf staring at me..so how can i not buy it?! LOL!  So far, i've translated 20 initial pictorial pages and google translate has been doing a very good job for me. LOL!  I can safely say i can now understand the ingredients listed in French in this book.  :D


Sunday, September 26, 2010

Daniel's Cake


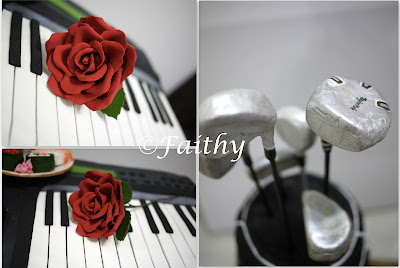
My friend wanted all her husband's favourite things to be incorporated in the cake and wanted them in 3D. I was quite happy with the cake until delivery time. Because the cake structure for the golf bag wasn't strong enough, and while carrying down the stairs and in the car, the structure moved and caused the bottom tier of the cake to crack and break...so the entire cake sank 3 inches to the bottom. Thank God that the fondant didn't crack that badly and i was able to patch up a bit. But the cake ended up looking like saggy old bag with a heavy bottom. I was sooo upset and disappointed with myself for not going with my instincts that the structure wasn't strong enough.  I told my husband 5 times that I think the rod isn't strong enough but he kept saying it is OK and reassured me that it will be alright. True enough, my worse fears happened right before my eyes, the cake cracked and moved.. my heart sank  and i almost cried.

My friend was very nice about it and comforted me and she just called to tell me that nobody at the party noticed the golfbag cake sagged until she mentioned it. But honestly, I'm still feeling quite lousy about it.  My heart ached further when I saw the after party photo of the sagging cake and tilting to one side.  I think I'll need some time to recover.. 

Everything is made with edible material. The golf bag, notebook, and keyboard all are made of cake, sushi is made with cakeballs, xrays are handpainted gelatine sheets and the rest of the stuff made with gumpaste and RKT.

Side View of the cake

details of the cake

details of the caviar, bellini with caviar, sushi

details of the sugar rose, golf clubs


Lesson learnt:  Trust my own instinct and always insist on a stronger structure when everyone else say otherwise...cos only I know how my cake is going to turn out... I think I should learn how to do carpentry work too instead of relying on others.... lol!

I planned to bake this week's HCB cake but i think now i'm too sad & disappointed to want to bake anything after my golfbag cake sank... 


Saturday, September 4, 2010

Food (Frederick) Cake


This is what i have been doing and preparing hence unable to bake my weekly HCB assignments...getting all the gumpaste ready to harden and dry..which takes longer to dry in our climate. 

I've been asked by my friend to make a cake for her nephew's 21st birthday and she told me that he loves food. Hence it's all about food.  My friend said i have include pocky, lobster, sushi and an assortment of other food if possible. 

Everything is made from edible material, including the disposal box, sauce containers, green leaves.  Pocky and Chicken Nugget is hand-painted.  I was looking for sodium alginate to make fish roe or shall i say juice caviar..trying my hand in molecular gastronomy or trying to copy Heston Blumenthal..hahaha.. but i couldn't find such chemicals here..(even normal antibiotics are not allowed to be bought over the counter unless with doctor's certification..see..how to buy chemicals?!). Thus, i had to crack my head and used a more economy way of making tiny gummy balls instead. :D

The cake almost left me in tears..don't know why the cake kept breaking up and i couldn't get the pocky cake to stand upright...thankfully i had extra cake and remade it again..but had to make it bigger than what i had planned in order for it to be sturdy enough to stand.

Thank God everything turned out well in the end. I did pray very hard. :D  And God gave me a verse in Philippians 4:6-7.  "Do not be anxious about anything, but in everything, by prayer and petition, with thanksgiving, present your requests to God.  And the peace of God, which transcends all understanding will guard your hearts and your minds in Christ Jesus. "

Sunday, August 1, 2010

Cow Cake


Are you thinking what i am thinking?  The cow looks like a cross breed between a cow and a pig right? LOL!  

I want to thank my flickr pal,  [Schmish] for helping me with the cake structure. She was so sweet to draw out the cake structure for me so i can have a clearer idea what i should be doing for a 3D standing cow cake and she was also patient enough to entertain all my silly questions about DIY. I am really not a diy person and neither is my husband (20 years of marriage and i've never seen him hold a power tool before or a normal non-electric saw...) and i have absolutely no clue how to use a power tool either.  I showed my husband her drawing and he said he can do it. So, he helped me out with the cake structure, however, he insisted that the 'legs' shouldn't be that long cos cow doesn't have long legs and to trust his judgement... But just as i expected, the 'legs' he provided weren't long enough and i ended up with a short-legged cow..LOL! And the 'legs' were UNeven in length too!   I had to hide the legs (or pretend the legs to be covered with tall grass!).  With my not so great cake sculpting skill coupled with his less than satisfactory diy skill, my cow at certain angle looked like a pig!.  

Nevertheless,  I had fun making this cake...i had a lot of first time with this cake..lol! First time i made a structure for a cake, and first time used airbrush and first time i 'steamed' my cake.   Before i 'steamed' (like Cake Boss) my cake to give it a shine, the airbrushing looked better, but after i 'steamed' it, the airbrushing looked much darker..and quite patchy!  My lesson, never steam airbrush cakes until i have mastered the art of airbrushing first.  I know i'm suppose to practice on a piece of paper first but i didn't..i just went hands-on with it! :p    This is not a paying cake, so i get to 'experiment' right? 

Happy Birthday Hannah!  Hannah is born in the year of cow, hence she requested for a cow cake. :D  


Monday, June 21, 2010

Pixar UP Cake

No HCB bake this week cos my daughter and I don't really like coconut in cakes. *shrugs* Don't know why....just not too fond of it. But i like coconut in curry and some other local desserts though.  Also, i've been busy baking my daughter's belated birthday cake.  So here it is....

Made this UP Cake for my daughter's belated birthday celebration...a must after the UP Cookies..:) 

Up Cake: Front View

Hand molded Russell, Dug & Carl

Hand molded Kevin

Up Cake: Side View

Cake Flavor: Strawberry Cake w/ Strawberry buttercream & fresh strawberries filling

This strawberry cake is very easy to bake - quick and fast - so fast that it felt like it's made from cake box mix..the cake turned out beautifully but i have one complain though, the texture/crumbs is a bit rough imo. Not sure if it is because i'm spoilt after baking so often from Rose's HC book as all of her cakes, the texture is very soft and crumb is also very delicate that it melts in your mouth, so much so any cakes not up to par i just can taste it right away?  *shrugs* This cake is yummy except the texture just feels rough on my tongue. Other than that, the taste, flavor is great.   Have i become cake snob (besides chocolate snob..) too? *rolling eyes*

Recipe as requested by Hanaa:-

Strawberry Cake (by Michele Foster)


Oven Temp: 350f
Baking Time: 35mins


3 cups cake flour
1-1/2 cups sugar
1 Tbsp baking powder
1/2 tsp baking soda
1/2 tsp salt
2 Tbsp strawberry gelatin
1 cup butter, soften
1-1/4 cup buttermilk
2 eggs
2 tsp vanilla extract


Sift together flour, sugar, baking powder, baking soda, salt and strawberry gelatin powder.  Add butter and 1 cup of buttermilk. Mix slowly until combined then beat at medium speed for 90 sec. Meanwhile mix eggs and vanilla & remaining buttermilk. Scrape down sides. Add to batter, mixing in two batches for about 20 secs each.  Pour into two 8" or one 9x13" pans.  Bake at 350f for 35mins. Cook for 10mins before turning into the cooling rack. Frost with your favorite buttercream after completely cooled.

Saturday, May 8, 2010

Toy Car Cake


I'm really happy how this cake turned out esp when I wasn't feeling well and didn't really feel like making this cake.  However, after reading Friday's daily bread devotion (http://odb.org/2010/05/07/becoming-inclined-to-god), i managed to complete this cake. Thanks to God & Praise the Lord! :) 

Cake alone is 16" x 12" and it's quite huge & very heavy.  Chocolate Cake with Chocolate Buttercream.  

Happy Birthday Daniel! :D

Sunday, March 14, 2010

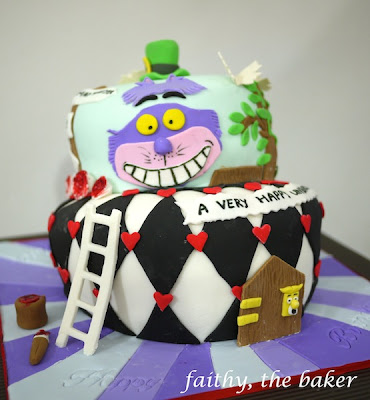
Alice in Wonderland Cake


It's my daughter's turn to bring a cake to Church for Youth Fellowship for the month.  I decided to make an Alice in Wonderland's cake after watching Tim Burton's 3D movie.  Don't ask me why, but i just love the story of Alice in Wonderland since young.  

Thanks to a very generous flickr-friend Taya @deliciouslydecadent for her topsy turvy cake tutorial that i finally plucked the courage to do this. However, i did a lousy job! LOL! I cut the cake the wrong way, ie, i cut it in the opposite way (instead of a pyramid, i did a cone..) and i realised my mistake a bit too late. And to salvage it, i did everything the wrong way to get it right. LOL! Then i  place the top tier a bit off the centre... er....yup..i don't know what's wrong with me..i don't see it until i get everything done and then noticed it is off the centre. But I'm quite happy with my 'un-planned' last minute design and my inspiration is from other flickr members - Genevieve @forloveofcake and Rebecca @sweetcakesbyrebecca.  Needless to say, of course their design is 1000x better than mine. :))

The problem with me is i don't know how to plan & design a cake. This cake design just came up as I went along.. I asked my daughter who is into design (she plans to study it as she enters into university this year) to help me think of something and she fell asleep while thinking - so much for counting on her!?!?  I actually had some ideas in my mind but as i was doing it, i completely forgotten and colored the top tier fondant in the wrong color. So i had to just add whatever i thought of as i went along.   Also i spelt the Happy "UN-Birthday" wrongly...and NOBODY at home noticed it.. aargghh.. until when the cake was about to be cut..someone then noticed it!  


Here's the left over cake.  Coffee cake with coffee buttercream & white chocolate coffee ganache.  A lot of caffeine in the cake. I think you don't have to drink coffee after eating a slice of this! LOL!   

Monday, February 22, 2010

Yacht Cake 2 ( replacement cake )


This is the replacement yacht cake i had to make after the 1st yacht cake fell from the stool. I stayed overnight to re-bake and re-decorate the cake again and slept only 2 hours just to get the cake to be delivered on time.  

This cake is much smaller than the 1st yacht cake since i didn't have much time and i downscaled the batter and also the size of the cake. I didn't have as much time to add in as much details on the cake as i would like, plus lacking sleep i was having a headache.

The yacht is named 'Tuxedo" because that's the name of my boss' boat...but of course the above doesn't look like my boss' real boat. 

Everything on this cake is made from edible material and cake flavor is Coffee Cake with Coffee Buttercream. 

Thankfully this cake made it in time for my boss' celebration dinner.

PS: Im typing these 2 yacht posts with 2 hrs of sleep..so my sentences might sound weird..but i'll correct later after i have enough sleep..hahahaha..

....The Next Day....


My boss gave me this photo he took last night after the cake was cut.  I find it pretty interesting to see the  inside of the cake though..maybe because most of the time i don't get to see the inside of the cake or the cake being cut.


Yacht Cake 1 ( fell & damaged b4 delivery )


I made this cake for my boss' birthday celebration. Took me the entire day to decorate this cake and when i completed, my husband moved the cake to be placed onto a stool while i cleared up the table and then i accidentally touched the side of the board and then entire cake fell off from the stool and smashed into bits! All my hard work gone...wasted!  I was way too shocked and lost my sanity a bit and hence for got to take photos of the damaged cake..which i should have. 

Then i ended up staying up overnight and slept only 2 hours to re-bake and re-decorate the 2nd yacht cake ( in my next post ).

Right from the beginning, i had lots of problems with this cake..with fondant cracking, with cake sliding..etc and hence the boat looked rather 'bloated'..LOL!

Everything on the cake is made from edible material except the candle of course.  Cake Flavor: Chocolate Cake & Coffee Cake with respective buttercream...but too bad nobody got to eat it..all went to the bin! :(


Monday, February 8, 2010

Book & Vintage Car Cakes

A lady from Church requested that i bake a cake to our monthly fellowship gathering for her 4 grandsons' birthday.  I don't really know what her grandsons like so it was difficult to come out with a design.  And for 4 boys to share 1 cake seems a bit sad..so i thought why not bake 2 cakes for them instead since I couldn't decide if i wanted to decorate the cake into a book or a car, i might as well do both and see which one turns out looking better...hahahaha...  Perhaps also because of this, both cakes turned out less than satisfactory to me. There are a lot of mistakes and i can spot them right away.  I decorated both cakes at record time..hahaha..i decorated both cakes the same time i decorated the camera cake i did earlier... so 1st lesson i've learnt - "never decorate more than i can handle"!   

Both cakes side by side

Book Cake

Vintage Car Cake

From the photos above, you can see i didn't cover the cake board as i ran out of fondant...so i had limited fondant to work with. :p  And I seriously think that there is something wrong with my eyes (other than the floaters that are still floating in my right eye!)..every time i carve a cake, it will end up slightly crooked..no matter how i try..even after taking proper measurement!?  Arggh!  

The 2nd lesson i've learnt is: "use modelling paste for all the other parts of the car, tires, bumper etc and not just fondant cos it is way too soft"! The vintage car is a copy from one of Debbie Brown's book and yes, i can't even copy properly! LOL! Seriously, it looks terrible and far from her original one! I think my cake here looks more like a cartoon car instead of a vintage car..and it has flat tires! Or perhaps it looks more like the vintage car had been wrecked or something..LOL! Besides flat tires, the bumper is also crooked..hahahahaha.. looks like the car is pretty knocked up..lol!  See what i mean...argggh..modelling paste please the next time...this is the result of no proper planning which is true cos i didn't plan ahead what i needed.

The gathering went on well and i hope the 4 birthday boys enjoyed their cakes! :)  I forgot to add that both cakes are made of chocolate cake with chocolate buttercream covered with chocolate ganache.  Yup.. chocolate again.. :)

PS: Nobody mentioned about the car looking wrecked so i guess they probably thought i did that on purpose..LOL!


diary of Faithy, the baker Copyright © 2009 Cookiez is Designed by Ipietoon for Free Blogger Template