Monday, February 22, 2010

Yacht Cake 2 ( replacement cake )


This is the replacement yacht cake i had to make after the 1st yacht cake fell from the stool. I stayed overnight to re-bake and re-decorate the cake again and slept only 2 hours just to get the cake to be delivered on time.  

This cake is much smaller than the 1st yacht cake since i didn't have much time and i downscaled the batter and also the size of the cake. I didn't have as much time to add in as much details on the cake as i would like, plus lacking sleep i was having a headache.

The yacht is named 'Tuxedo" because that's the name of my boss' boat...but of course the above doesn't look like my boss' real boat. 

Everything on this cake is made from edible material and cake flavor is Coffee Cake with Coffee Buttercream. 

Thankfully this cake made it in time for my boss' celebration dinner.

PS: Im typing these 2 yacht posts with 2 hrs of sleep..so my sentences might sound weird..but i'll correct later after i have enough sleep..hahahaha..

....The Next Day....


My boss gave me this photo he took last night after the cake was cut.  I find it pretty interesting to see the  inside of the cake though..maybe because most of the time i don't get to see the inside of the cake or the cake being cut.


Yacht Cake 1 ( fell & damaged b4 delivery )


I made this cake for my boss' birthday celebration. Took me the entire day to decorate this cake and when i completed, my husband moved the cake to be placed onto a stool while i cleared up the table and then i accidentally touched the side of the board and then entire cake fell off from the stool and smashed into bits! All my hard work gone...wasted!  I was way too shocked and lost my sanity a bit and hence for got to take photos of the damaged cake..which i should have. 

Then i ended up staying up overnight and slept only 2 hours to re-bake and re-decorate the 2nd yacht cake ( in my next post ).

Right from the beginning, i had lots of problems with this cake..with fondant cracking, with cake sliding..etc and hence the boat looked rather 'bloated'..LOL!

Everything on the cake is made from edible material except the candle of course.  Cake Flavor: Chocolate Cake & Coffee Cake with respective buttercream...but too bad nobody got to eat it..all went to the bin! :(


Wednesday, February 17, 2010

Pineapple Tarts

Every year, just before Chinese New Year, i will order my fave pineapple tarts from a friend's friend who makes the most amazing melt-in-the-mouth pineapple tarts ever. However, this year she stopped baking them..and i am left with no pineapple tarts for Chinese New Year! Arggh...!  Pineapple tarts is my all time favorite goodies during Chinese New Year among others like 'bak-kwa' (..like beef jerky..but it's pork and sweeter and juicer), love letters (almost like tuiles and traditionally done under charcoal fire with a patterned metal clamp..which i remembered i did help out when i was a little kid..), Lapis cake, Suji cookies, Bangkit, etc.. I wanted to give pineapple tarts a miss this year but one of my amazingly talented flickr friend, "Sweet-Tooth-Fairy" had to tempt me with her recipe and her pineapple tarts that i am left with no choice but to bake some for myself. And so my quest for the perfect pineapple tarts (to my tastebuds that is..lol!) began...

My first batch of pineapple jam was a bit too moist (4 pineapples in total).  But nonetheless was still ok but a bit more difficult to handle so the shaping of the soft pastry was a bit difficult. So instead of round, it was a bit 'dome' shape - see photo below..supposedly to be a bit round..but ended up dome..lol!  It's sweeter but the pastry does have the melt in the mouth texture. Overall, it was good but still room for improvement. My husband said the pineapple jam was a bit sweet and has no tangy flavor. 


For experiment no. 2, I actually wanted to buy store-bought pineapple jam at the speciality bake-store but last minute all the ready-made jam were sold out..so i had no choice but to cook my own jam again! This time, i bought 6 pineapples (not totally ripe) and grated them all together and cooked them in a non-stick wok and till dry.   I'm not too sure if it is because i had more experience or what, but i shaped the pastry much neater this time and faster too. See the pastry below is more compact and neater..and the jam inside is drier too.


My husband likes the 2nd batch better as the pineapple jam has a bit of sourness/tangy taste and the pastry is not as sweet, has more texture but still maintaining the melt-in-mouth quality..except he thinks the pastry is a tad too buttery.  He said if i cut down on the butter a bit more would be perfect....but that would be experiment no. 3..after Chinese New Year... Although i still have pineapple jam stored away in the freezer..:)..but i need a break from pineapple tarts..LOL!

Wishing all a Happy & Prosperous Chinese New Year! 
And May the Year be Tigerrific! :) 
新年快乐,身体建康,万事如以,恭喜发财! 

Monday, February 8, 2010

Book & Vintage Car Cakes

A lady from Church requested that i bake a cake to our monthly fellowship gathering for her 4 grandsons' birthday.  I don't really know what her grandsons like so it was difficult to come out with a design.  And for 4 boys to share 1 cake seems a bit sad..so i thought why not bake 2 cakes for them instead since I couldn't decide if i wanted to decorate the cake into a book or a car, i might as well do both and see which one turns out looking better...hahahaha...  Perhaps also because of this, both cakes turned out less than satisfactory to me. There are a lot of mistakes and i can spot them right away.  I decorated both cakes at record time..hahaha..i decorated both cakes the same time i decorated the camera cake i did earlier... so 1st lesson i've learnt - "never decorate more than i can handle"!   

Both cakes side by side

Book Cake

Vintage Car Cake

From the photos above, you can see i didn't cover the cake board as i ran out of fondant...so i had limited fondant to work with. :p  And I seriously think that there is something wrong with my eyes (other than the floaters that are still floating in my right eye!)..every time i carve a cake, it will end up slightly crooked..no matter how i try..even after taking proper measurement!?  Arggh!  

The 2nd lesson i've learnt is: "use modelling paste for all the other parts of the car, tires, bumper etc and not just fondant cos it is way too soft"! The vintage car is a copy from one of Debbie Brown's book and yes, i can't even copy properly! LOL! Seriously, it looks terrible and far from her original one! I think my cake here looks more like a cartoon car instead of a vintage car..and it has flat tires! Or perhaps it looks more like the vintage car had been wrecked or something..LOL! Besides flat tires, the bumper is also crooked..hahahahaha.. looks like the car is pretty knocked up..lol!  See what i mean...argggh..modelling paste please the next time...this is the result of no proper planning which is true cos i didn't plan ahead what i needed.

The gathering went on well and i hope the 4 birthday boys enjoyed their cakes! :)  I forgot to add that both cakes are made of chocolate cake with chocolate buttercream covered with chocolate ganache.  Yup.. chocolate again.. :)

PS: Nobody mentioned about the car looking wrecked so i guess they probably thought i did that on purpose..LOL!


Sunday, February 7, 2010

True Orange Genoise

Rose's Heavenly Cakes, Page 179: True Orange Genoise

Since i love anything orange and esp. the combo of chocolate and orange. I decided to bake this cake as my husband's birthday cake.  

I made the orange curd & ganache the night before.  I used Sunkist orange juice and reduced it by microwaving it as mentioned in the "Notes" (since it's impossible to find Seville oranges here in Singapore).  I have to say that i really like the orange curd! I had to refrain myself from eating the orange curd before i bake the cake!

I didn't know i had to make Beurre Noisette until last minute when i read the recipe! :P!  Heated the butter until the milk solids turn brown and pour it through a sieve. However, i realised that my sieve is not as fine as it should be since i can still see little brown dots in the butter.  Then i remembered i have this oil-filter paper which filters out every minute stuff...from the oil..


Packet of filter-papers - always a staple in my kitchen cabinet.


As you can see, after running the butter through the filter paper, the tiny tiny brown milk solids are "trapped" on the paper?  Amazing isn't it?  :)  


A tsp of vanilla added and covered with airtight lid. 

After making the beurre noisette, i forgot to take photos! So no more steps till the final cake! The Genoise sponge turned out well and as per instruction, i layered with orange curd and orange syrup.  Ta-Dah! Here's the cake..i didn't do much decoration as my husband didn't want a too elaborated cake. LOL!  So i just piped some white chocolate ganache that reads "happy birthday". 


Verdict: Everyone loved the cake. Of course my husband loved it! He said it is very good.  However, i think i brushed too much syrup since i find the cake a bit on the sweet side but still i do like it since i've always love chocolate & orange combo.  My colleague MH who has a (very) sweet tooth and an orange/chocolate lover said this is really good and she likes it a lot. She also mentioned that the cake sweetness is just right.

However, i really wished i had Seville oranges because i believe that using the Seville oranges probably does make a difference. Just like turbinado sugar vs brown sugar i think as in my earlier upside-down pineapple cake..


Monday, February 1, 2010

Individual Pineapple Upside-Down Cakes


Rose's Heavenly Cakes, Page 339: Individual Pineapple Upside-Down Cakes

I didn't have the required pineapple pan or the required sized ramekins, so i baked it in a 8"-pan. However, i think a 6" pan would have been better...cos i realised the batter was too thinned out on an 8" pan.  I wasn't in the best of mood either after a serious family meeting chaired by my sister. So this was more like "i want to get over and done with" cake. I didn't have cherries topping either and added glaced cherries instead to add a bit of color. As you can see the sides are bit burnt..or over caramelized..LOL!  

Can't find turbinado sugar, so i substituted with brown sugar and perhaps i should have added less sugar since the cake batter 100g of cake flour vs 100g of brown sugar turned out quite sweet.  The Caramel topping & the Pineapple Caramel Drizzle made it even sweeter.  I couldn't wait and took a bite when it was still hot and for that moment, i thought i was going to turn diabetic!  Much too sweet for my liking.  Perhaps the fresh pineapple that i used was really sweet to begin with, as sweet as the canned one.   My husband & daughter said the cake was good since they are both able to take sweeter desserts compared to me - but they did mentioned that it is much sweeter than what they would like.  I tried the cake the next day again straight from the fridge,  I think this cake tasted better when it is cold - not that sweet compared to when it is hot.   I'll cut half the sugar in the batter if i do make it again. :)

Monday, January 25, 2010

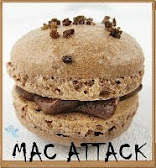
[MacTweets/ma4] Mac-A-Valentine: Ispahan Macarons


My version of Ispahan Macarons: Rose, Raspberry & Lychee (Litchi)

I was reading Paris Patisseries when i saw the recipe of the famous Pierre Herme's Ispahan Maracons.  I thought it would be a good idea to bake these since it has a tinge of rose flavor suitable for Valentine's Day.   However, his original recipe is rather time-comsuming to make so i just borrowed his idea of combining the 3 flavors: Rose, Raspberry & Lychee.

The macaron shells are flavored with rose essence and sandwich with raspberry jelly centre & lychee/ rose flavored buttercream.  I used the same italian meringue recipe from I love Macarons by Hisako Ogita since i wanted something fast.  I was also baking Chocolate Tweet Angel Food Cake at the same time so my entire kitchen was rather chaotic & messy..lol! :S


Please do check out other bloggers' macarons & flavors listed on http://mactweets.blogspot.com!


Rose Macaron Recipe (requested by Jamie)
Adapted from I love Macarons by Hisako Ogita
Macarons

Ingredients:-

(A)
60g of almond powder
80g of icing sugar

(B)
50g of eggwhites

(C)
40g of granulated sugar
40g of water

(D)
½ tsp of rose essence
red colored powder (add to your discretion)

(E)
1 tsp of eggwhite powder (Optional)


Method:
1. Preheat oven to 150c (book mentioned at 190c - so largely dependent on  your oven temperament..lol! Mine is always hot!)
2. Mix [A] together and process it for 10-20 secs in food processor till fine. Sift it and set aside.
3. Mix ingredients [C] together in microwaveable glass and stir to dissolve sugar. Microwave for 20 sec – take it out and stir to dissolve the sugar. * (check step 4) * Microwave for a further 3½ - 4 mins till the sugar syrup reaches 110c or softball stage. (If you are lazy like me, just look at the syrup, it should be thick and flows like glucose – that should be it). You can also heat sugar syrup over the stove.
4. While the sugar syrup is in the microwave, with handmixer beat the eggwhites [B] till frothy and add in [E] (optional) and beat till soft peaks.
5. When the sugar syrup is ready (be careful since the glass will be very hot!), pour it into the meringue in a slow steady stream avoiding the handmixer (with handmixer still beating). Turn the mixer on low speed and beat till the meringue cools down (should be fast since it’s only very little eggwhites).
6. Pour in half [A] into the meringue & fold. Add the other half in and fold further. Add [D] and fold further. Unlike the French method, this method needs to be folded more – otherwise you’ll get peaks. Fold (Macronnage) until the mixture turns a bit shinny and flows thickly.
7. Pipe onto baking sheet on tray & Leave to dry (should be pretty quick – like 10-15mins?)
8. Place in oven and you’ll see feet rise within first 5 mins. If it doesn’t means failure. If it does, after 5 mins, open the door slightly ajar and bake for further 5mins. After turn the oven to 130c (with door still ajar) and bake for another 5 mins.  *(Note: This step largely depends on your oven..my oven is extremely hot..so this always works best for me).
9. Leave to cool and remove macarons from baking sheet.

Raspberry Jelly is made from raspberry puree and agar powder. I don’t know how much exactly cos I always estimate by ‘feel’.

Rose Lychee (Litchi) Buttercream is made by adding Lychee puree (I used canned since they are not in season now) & 1 tsp of Rose water into the buttercream. Again I did this by estimate.


Chocolate Tweed Angel Food


Rose's Heavenly Cake, Page 159: Chocolate Tweed Angel Food

To be honest, i've never eaten an angel food cake before, so when Marie said this recipe is up next in line, i was pretty excited.  I've always assumed angel food cake is like chiffon cake.  Afterall, i have plenty of eggwhites in the freezer. :)  I defrosted more eggwhites than i should..since i usually collect my eggwhites in small containers, i can't remember exactly how many eggwhites there are per each container.  Since i had excess eggwhites defrosted, i made macarons with it for the upcoming MacTweets Mac-Attack4 (that will be in the next post).

Again, this cake is pretty easy but the only thing that got me really worried is that when i beat the 16 eggwhites, the whites fluff up till it's almost the top of my KitchenAid mixer..and i can't really tell if it is medium peak or stiff peak, since it is way up the top of my mixer and when i lift up, i can't really tell either..lol!  So i just made an estimate guess on what i think is stiff peak..:p

I made a small mistake: I put rice in the empty glass bottle so that it can be weigh down when i cool the cake upside down..however, in my haste i forgot to tightened the cap and the bottle toppled over and i had rice all over my cake. Had to brush off all the rice and some got stuck (in the cracks) and not easy to remove! I suppose the uncooked rice does add to the crunch..lol!

Ok..you see half of the cake above because, i only frosted half of the cake! LOL! That's because i ran out of heavy cream and i had only half of the required amount.

Verdict:  I like it and so does everyone in my family!  It's very soft and fluffy and taste quite like chiffon cake except it has less flavor than chiffon cake, but the cream-frosting made up for the flavor.  Normally i would eat chiffon cake on it's own, but for angel food cake, it is rather bland without any whipped cream or syrup or whatever is the term for it...(my mind's blank after too much baking for the day..)?  Without the heavy-cream, it taste quite like a diet cake to me..lol! I guess it is since only egg whites and no oil and the little chocolate doesn't really help either!  So it is best to eat this cake frosted with the cream suggested in the book. :)


Thursday, January 21, 2010

Camera (Lumix GF1) Cake

I made this cake for my boss' friend's birthday.  Initially i wanted to have the camera-cake standing up but i was worried if the 'lens' of the cake could hold up even with dowels..esp. when the chocolate cake i baked was quite soft.  After much thought, i decided to lie the cake flat...that way i don't have to worry about the lens not holding up. :)  I modeled this cake after my own camera. :)

Cake is made of Devil's Food Cake, Chocolate Buttercream & Chocolate Ganache.  I'm quite happy with this cake. Although it is not 100% perfect, at least it is what i had in mind.  My "paint-writing" needs major improvement...LOL!

TOP VIEW OF CAKE


BACK VIEW OF CAKE


FRONT VIEW OF CAKE


Monday, January 18, 2010

Torta de las Tres Leches

Rose's Heavenly Cake, Page 211: Torta de las Tres Leches

I have difficulty pronouncing the name of this cake....also implies that i've never even heard of this cake before nor  have i tasted it. I admit i'm bias, the thought of a very wet cake all soak up in milk doesn't seem very appetizing to me.

I woke up in the morning, figured i better make the Leche mixture first. Half awake, I mixed ALL the ingredients together in a huge pot! Didn't seem right, so i read instructions again and realised that i should only mix the milk & sugar together, reduce it by half..then add the condense milk and the heavy cream.   No choice, had to throw alway all the milk and start all over again.  Can i just say that i HATE the smell of reducing milk... (even though it is not as bad as parmesan cheese which i think smells exactly like baby's vomit...*sorry*..).... made me sick.  So i cheated - got my domestic helper to watch the fire and told her when the mixture is reduced to 2.5 cups to pour in the condense milk & heavy cream.  Anyway, are we suppose to pour in the condense milk and heavy cream when the reduced milk is still hot or after it has been cooled?  Since the instruction didn't say to wait till cool..i just told my assistant (hahaha) to pour in almost immediately after transferring to a huge bowl. After, i realized that the 'fats/oil' from the heavy cream and condense milk will separate (when mix with hot milk), surface to the top and harden when it is cold..so how? No choice..so i scraped it off! I'm definitely not going to redo and smell the reducing milk all over again...

Making the sponge cake wasn't difficult. In fact my sponge cake didn't crack and looked quite good imo - since i was expecting a crack. See the photo below..my sponge cake looked great doesn't it?


When the cake cooled, i removed a little of the bottom crust first  - (bottom crust which actually looked quite good so i didn't know if i should remove or not - but i did follow instructions and removed a little). After, I removed the top crust which came off quite easily.  Ok..i ended up somewhat with only 4 cups of milk...much lesser than the 4-2/3 cups mentioned in the book.  But in the end i didn't pour in the entire 4 cups of milk i had left. I only pour in about 3.5 cups..since the cake looked like it's quite "bloated". I didn't really want a too soggy cake either.


The sponge cake all soaked in milk - looks quite awful doesn't it?  If i had to eat that cake above, i would feel sick even before tasting it...  But it's ok because i realised after the next day, the wet left-over crust can be scraped off quite easily and you'll end up with this nice cake...(see pic below)... ah..much better isn't it? Already more appetizing, i think.


After removing the soggy left over crust..my cake is ready to be covered with whipped cream. I decided to use whipped cream instead of heavy cream because i find whipped cream more stable than heavy cream, or probably just my imagination.  I added a few drops of red coloring, frosted the cake and piped flowers around, i wanted to pipe in a large rose in the centre of the cake but ran out of whipped cream. So here it is my cake all covered & decorated..:)


The inside of the cake (in the pic above) looks spongy and dry but it's actually soaking wet with milk.  I'm actually glad that i didn't pour in all the milk, because even with 3.5 cups of milk, the cake is still very wet.

Verdict:-   This is the first time we tasted Tres Leches. My daughter said it's pretty unique and rather different but she likes it.  My husband said it's good..different from the usual cakes but it's good.  Me?  It's better than what i imagined it would be.  It's good, however, i do find it far too sweet for my liking...i can only eat a really tiny slice each time.. Tiny slice - reminds me of the movie "Confessions of Shopaholic" where this Rebecca Bloomwood's (Isla Fisher's character) mom offered Kristen Scott Thomas' character a slice of cake, she kept saying smaller smaller..and in the end cake was really really tiny..LOL!

PS: You can apparently make your own condense milk.  To make your own condense milk, check out Mary's blog at KeepLearningKeepSmiling.  Link to her recipe http://www.keeplearningkeepsmiling.com/2010/01/14/how-to-make-condensed-milk

Oh...and I baked Rose's Chocolate Streusel Coffee Cake again but into 24 cupcakes (made double portion of batter) for Church. Again i had left over streusel, melted it with the left over sour cream and piped it over the cupcakes.. Taste great in cupcakes too! :)


Wednesday, January 13, 2010

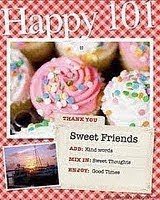
My Happy 101 Award


I received the Happy 101 Award from my two favorite bloggers, Tracy of Sugarcrafter and Sarah of Maison Cupcakes.  I'm surprised that I'm being awarded. My blog has always been a sort of personal diary where i keep an account of what i have baked - since i have the tendency to forget things quite easily.  I'm no good in writing or expressing my feelings, so most of my posts are usu. factual, and that usu. imo is quite boring..LOL! So, I'm rather flattered to receive such an award.  I have found that the best thing from creating this blog (other than refreshing my memory) is that it has led to me to 'meet' other interesting and amazing food bloggers like Tracy, Sarah and others who have all been so helpful and encouraging.

Rules of the Award:-
  • 1) Copy the award image into a post.
  • 2) List 10 things that make you happy.
  • 3) Tag 10 bloggers who brighten your day.
  • 4) Put in a link to their blogs.
  • 5) Notify the award receivers.
  • 6) Recipients to link back to the sender's blog.

10 Things That Makes Me Happy
  1. My Husband - cracks silly jokes all the time and makes me laugh
  2. My Daughter - tries very hard to get good results in her studies
  3. My Son - everything he does is like a milestone for us - when he suddenly speaks a new word or suddenly talks in sentence (ie, 3 words or more!), and when he seems to understand complex issues.  I'll be delighted when he can some day tell time..since we have been teaching him for years and he doesn't seems to get it..
  4. Shopping:  buying cookbooks, bake-wares, clothings, shoes..etc..
  5. Decorating cakes & cookies
  6. Reading cookbooks & other food bloggers' blogs, 
  7. Weekends - when i spend all my time with my family & cooking/baking.
  8. Good day at work during weekdays
  9. Christmas
  10. Holiday travels
I'm passing this award on to (no particular order):-
  1. Tiffany of Food Finery
  2. Juanita of SweetThings
  3. Jacqueline of Petalsweet Cakes
  4. Brandy of Cakes-a-nonymous
  5. Purplesque
  6. Patricia of Butteryum
  7. Shari of Whisk:AFoodBlog
  8. Pei-Lin of Dodol Mochi
  9. All of the Heavenly Cake Bakers' blogs including Marie's listed on Marie's blog
  10. All the blogrolls from MacTweets 
(PS: I know i 'cheated' for 9 & 10)..lol! ..but there's so many of them i follow all the time and it's really difficult to choose..)


I found a photo of myself (taken by my daughter) wearing a "Mr Happy" t-shirt which i thought is quite appropriate for this...lol!


Basically me in my kitchen: 5 steps to the left and 5 steps to the right  = total area of my kitchen..LOL!


Monday, January 11, 2010

Chocolate Streusel Coffee Cake


Rose's Heavenly Cakes, Page 55: Chocolate Streusel Coffee Cake

This cake is pretty straight forward so is not a difficult cake to bake. However, i don't understand why we have to bake the cake into a 6-cup bundt pan and 2 cupcakes. I would think it would be much easier to bake the batter either in all cupcakes or just 1 bundt pan right?  I have been dying to try out the mini bundt pans i bought from Melbourne April last year,  so i baked the cake into 8 mini bundt cakes. :)

I put in the chocolate streusel mixture (i did use light muscovado sugar this time - i realised i had a packet in my pantry all the time - i bought quite some time back and forgot about it! lol!) into the batter but i think i didn't put enough so there's quite a lot left. I heated up some left over sour cream, mix in the chocolate streusel mixture, a bit of butter & a bit of icing sugar and piped it over mini cakes.

Verdict: This cake is absolutely delicious! The texture/crumbs of the cake is extremely soft, delicate and very moist. Paired with the chocolate streusel it is absolutely heavenly! A MUST bake again cake! This recipe is definitely a keeper..not only is it easy to bake, it is soooo sooooo good!  Everyone in my family loves it.  I think I'm going to bake a batch of these again in cupcake form tomorrow. :)

Saturday, January 9, 2010

Mark Bittman's Food Processor Baguettes


Recipe from Marie's blog @ http://breadbasketcase.blogspot.com.

I think i did something wrong with my baguettes! Somehow my bread didn't develop these nice large holes that Marie's did..hers were so very nice and fluffy. Mine was so dense...i wonder if it is because i didn't let it raise long enough?  And i realised i didn't slash mine deep enough. The crust is a bit too hard, and the inside too dense. Overall, it is still edible but not what is expected i guess. I gotta try it again... :(

My husband thinks i'm wasting my time - afterall we can always buy great Delifrance baguettes at S$1.30..and in Singapore, everything is just within the neighbourhood.

PS: I forgot to take photo of the entire loaf of bread since i was eager to eat my dinner (above) and took a quick shot..LOL!

Thursday, January 7, 2010

Tiny Upgrade of Status..lol!


I set up a new blog (http://faithythebaker.blogspot.com) to deviate myself from the amateur status since a few fellow bakers have suggested that i should change my 'amateur' status and having baked so many cakes, i shouldn't be calling myself amateur anymore.

However, the thought of moving the entire blog to another blog and start over again just seems like an uphill task..LOL! So, i've decided to just stay put and made minor changes to the heading of my current blog instead.  I've changed it from "the amateur baker" to "Faithy, the baker" ...but still keeping the same link.  For now, that will do i guess..lol!


Wednesday, January 6, 2010

[MacTweets/ma3] Fruity Macarons


Fruity Macarons:-
Mangosteen Macaron Shells with Mango Pineapple Buttercream & Blueberry Jellied center.  

For MacAttack3 challenge we are suppose to try something different that we have never done before..so i decided to try making macarons using the italian meringue way - my first time making macarons with sugar syrup. :) I used the recipe from the Chinese publication of I Love Macarons by Hisako Ogita. The proportion between the Chinese & English Publications is a little bit different.  The Chinese version uses 50g of eggwhites which is what i was looking for and seems to have less sugar too. I didn't want to make a huge batch of macarons since i was only trying out for the first time. :)   I'm glad it turned out successful on my first try!   Since Mangosteen is purple in color, i thought i would color my macaron shells violet. I added violet color but i don't know why it turned out blue-green instead!  I kept adding the powder but it just didn't turn purple! Strange!


Yup, i own both the Chinese & English publications. :)
I bought the Chinese version first before the English one was available.


This is also the first time i'm using freeze-dried fruits. I bought the mangosteen, pineapple, rambutan & durian ones. I grind the freeze-dried mangosteen into powder and added it to the meringue.  The freeze-dried pineapple i pound into tiny pieces and add it into the mango buttercream for the added flavor.  Although i have fresh pineapple in the fridge, i didn't want too use it since i think it would be too over-powering..i just wanted a bit of an added crunch.  The blueberry jellied centre is made by adding a bit of agar powder to the blueberry filling (i had a tiny bit left-over in the fridge and had no idea what to do with it..LOL!..so i decided to try something new..and surprisingly the texture turned out quite well!)

It's a strange combo with so many flavors but surprisingly it turned out quite good! LOL!

Please do check out other bloggers' macarons & flavors listed on http://mactweets.blogspot.com!


diary of Faithy, the baker Copyright © 2009 Cookiez is Designed by Ipietoon for Free Blogger Template